Are AG Composites Stocks Arca Rail Compatible?
Yes, all AG Composites stock models are Arca rail compatible, so you can use any Arca Swiss accessories you’d like, including bipods and tripod heads.
AG Composites also manufactures Arca rails available in three lengths: 4-inch, 6-inch and 8-inch. Click here to purchase. All rails ship with screws.
Arca rails, along with any other accessory mounting system, can be easily secured to the stock with machine screws threaded into an aluminum bar that’s molded inside the forend of the stock.
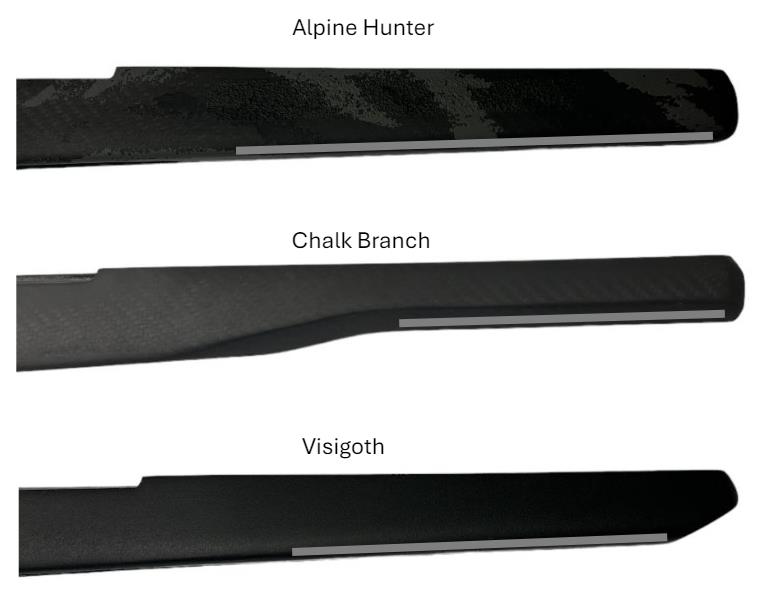
This aluminum bar, which is inside the forend of every AG Composites stock, is 1” wide and a ¼” thick. The piece of billet aluminum runs almost the entire length of the stock’s forend. It’s encased in our lightweight proprietary fill material. The bar extends from 1.5” forward of the recoil lug to 1” inch from the very front of the stock. The only exception to this is the Chalk Branch model, which has a shorter aluminum bar. The reduced length is necessary because of the unique shape of the Chalk Branch. (see image below)
When you receive an AG Stock from the factory with either a swivel stud(s) or a picatinny rail installed, these devices are secured to the stock with 10-32 machine screws tapped into the same aluminum bar. We’ve tested these fasteners with weights up to 80 lbs. without failure.
Installing an Arca rail
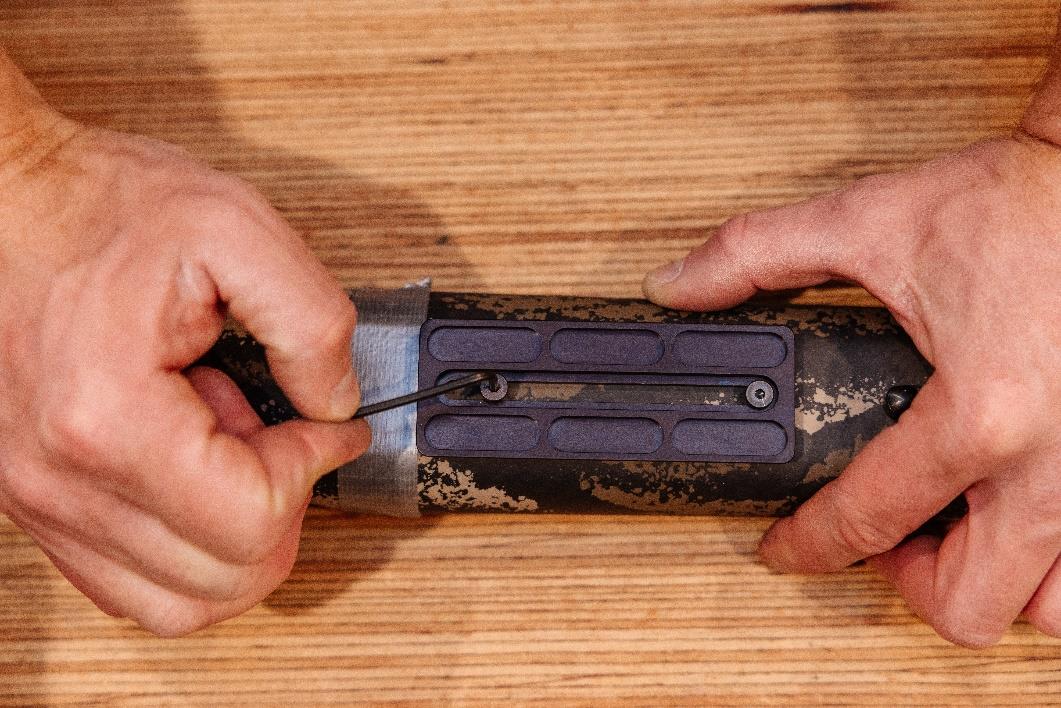
Tools needed: Ruler, drill, screwdriver/hex keys, guide drill bit and matching thread tap. Note that thread taps are often sold with matching guide bits. We suggest using 3/8-inch long 10-32 thread pitch hardware.
Installing an Arca rail is very simple and should take no more than five minutes. We strongly suggest removing the barreled action from the stock before proceeding.
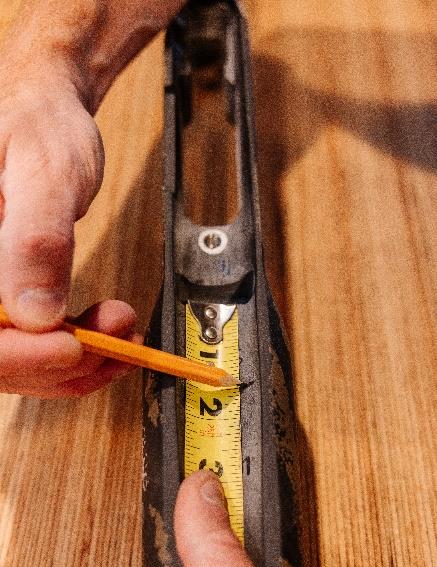
Start by finding the centerline of the underside of the stock forened with calipers, a micrometer or a tape measure. Make a centerline mark near the front of the stock and make one close to the magazine well. Using a pencil with light pressure, strike a line through both marks with a straight edge.
If you plan to use a bipod on the rifle, install it on either the swivel stud or the picatinny rail before selecting where to install your Arca rail. This will ensure that placement of the rail won’t inhibit the use of the bipod. This is generally only a concern with bipods that attach to swivel studs.
With the bipod installed, place the Arca rail on the stock at the desired location. Line the rail’s mounting holes/grooves up with the centerline you just created and mark locations to drill guide holes for your mounting hardware. Keep in mind that the screw closest to the magazine well must not be closer than 1.5” from the recoil lug. If you prefer better reference than eyeballing this distance, mark the barrel channel at 1.5” forward of the recoil lug and use a piece of marking tape to transfer the measurement around to the underside of the stock.
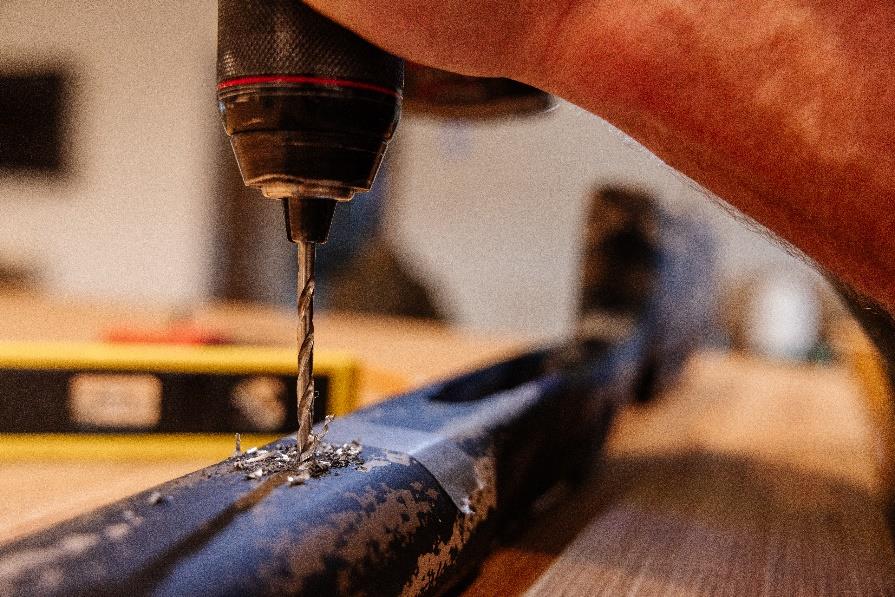
Once both guide holes have been marked, use a #21 drill bit to drill the pilot hole. Then, thread that hole using a 10-32 thread tap. It’s possible to use smaller or larger hardware, but we suggest 10-32 because, as mentioned, this is the thread pitch used to fasten the factory-installed accessories and it’s the size that ships with the Arca rails we sell.
Note that if your stock features two swivel studs, the rear stud can be removed and the hole it occupied can be used as one of the Arca rail anchor points. This is a matter of personal preference.
While drilling the guide holes, be careful to maintain a plumb drill bit. A drill press is not necessary but can be used if available. We suggest drilling to a depth of no more than ½” if ⅜” screws are being used. If the drill bit passes through the stock entirely, it does not matter. The far side of the hole will obviously be covered by the barrel. No harm done.
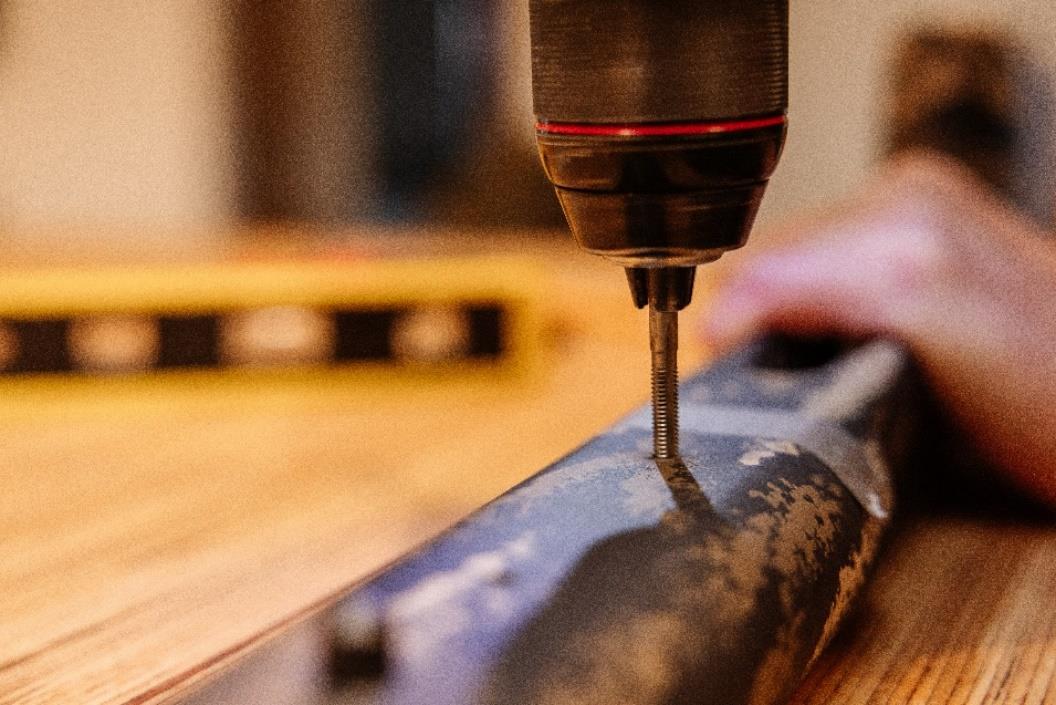
Exchange the drill bit for the thread tap. Do not use an impact driver to tap the hole. Using firm downward pressure on the drill and again being conscious to remain plumb, begin to tap the hole with moderate drill speed. Once the tap has produced some aluminum filings, it’s good practice to reverse the drill and remove the tap. Clean any aluminum filings that may have adhered to the cutting edge of the tap and reinsert the tap. Continue slowly tapping the hole until you think the aluminum has been threaded to a depth of roughly 3/8 of an inch. Remove the tap slowly and repeat the process on the second hole.
Place the Arca rail over the holes and install both machine screws hand tight (or 40 inch-pounds). Do not use an impact driver to install screws.
Some customers like to install a third screw when a long Arca rail is used. This is not bad practice, but it is not necessary. Thread locking compound is also optional, but we generally advise against it in case you want to remove the Arca rail in the future.
A common misconception is that the underside of the stock must be perfectly flat and in contact with the Arca rail for the entirety of its width in order to create a stable platform. This is not the case. Our customers have had great success mounting Arca rails on every AG Composites stock model, even ones with rounded or beveled cross-section profiles, such as the Chalk Branch, Carbon All Terrain, or K2.
It's worth mentioning that the procedure described above works perfectly regardless of whether you’re installing an Arca rail on an AG Composites fiberglass or carbon fiber stock.
Happy shooting!